Jacking Up the Vehicle
Solid jacking points are provided in the middle at both the front and rear. In front, the crossmember in front of the front differential is the preferred point. At the rear, use the middle of the round steel bar that spans the entire width of the van under the engine.
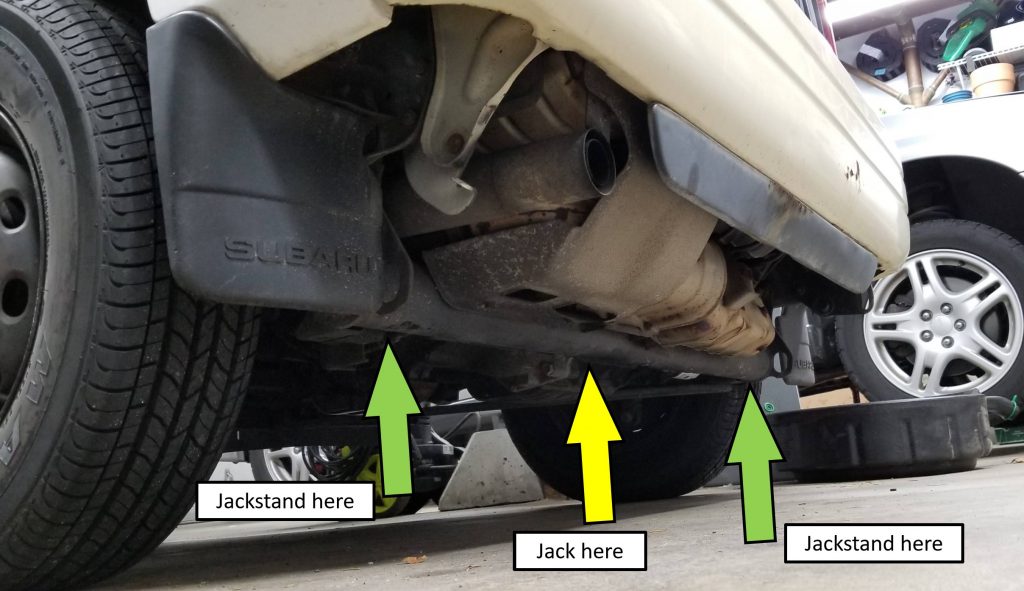
To support the front end of the vehicle, on each side there is a part behind the front wheel that protrudes downward from the body. This is specifically placed there as a jack stand point, and apparently for no other reason. In the rear, place the jack stands under the bar.
Safety note: Always use jack stands to support the vehicle. Never place any body part anywhere under the vehicle while it is only supported by a jack. Jack stands don’t fail, but jacks do.
Engine Oil
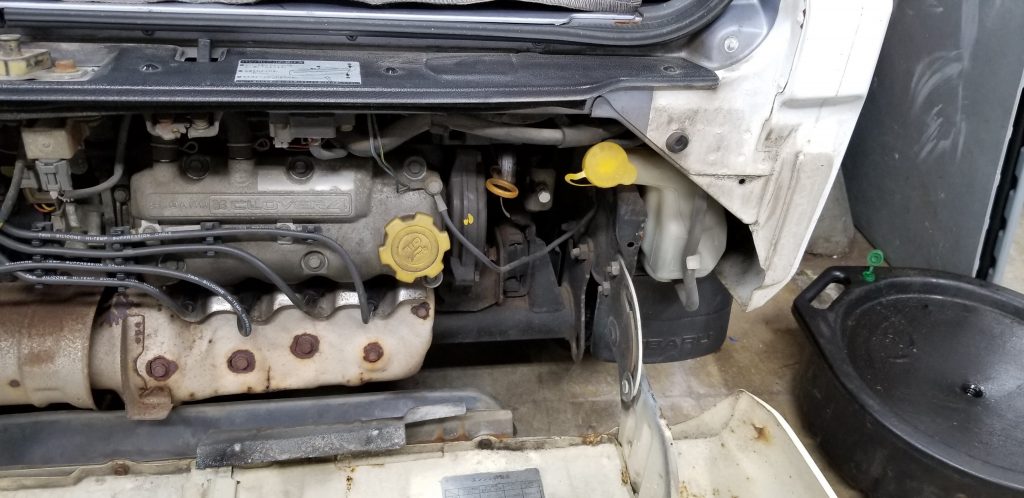
When you pop the rear bumper open, the engine oil dipstick and fill cap are right there in front of you, on the right. This means the oil can be changed without removing the engine access panel.
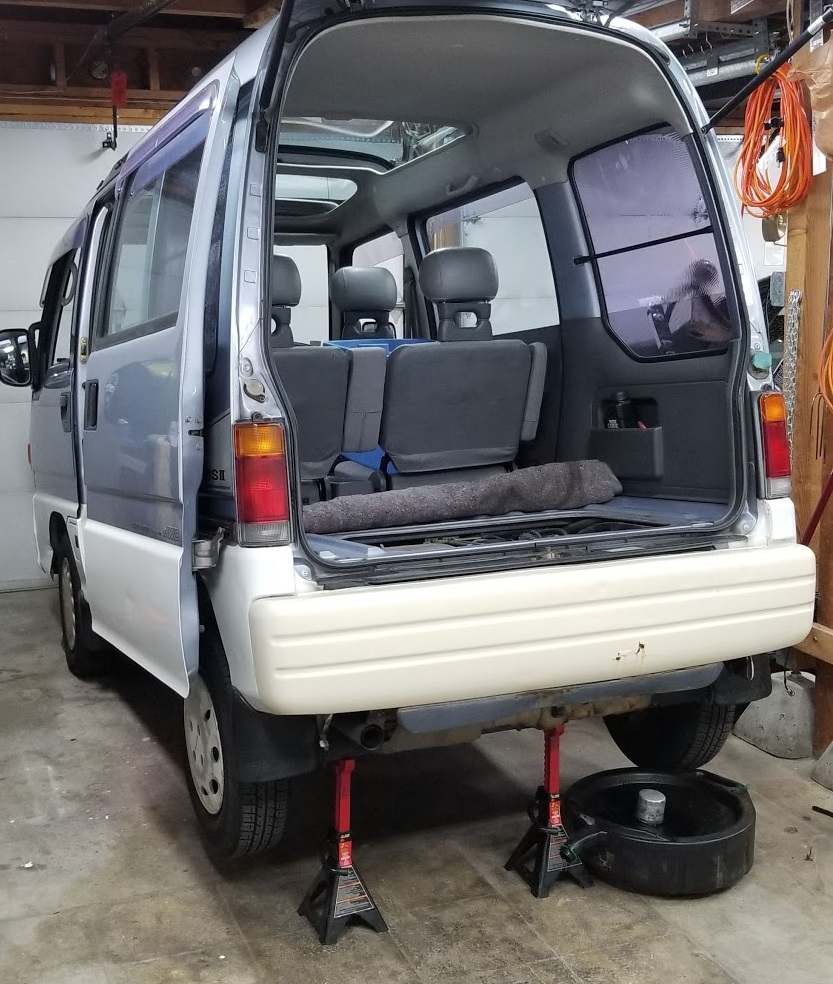
Follow the instructions above to raise the rear of the van and put jack stands under the rear bar. If you are only replacing the engine oil, it is not necessary to raise the front end, only the back.
The drain plug is located on the underside of the oil pan near the center of the engine. It requires a 14 mm socket. It is not visible from the rear, but it’s just to the front side of the oil pan and may be easier to access from in front of the rear wheel. Be careful not to lose the sealing washer when removing the plug.
After draining the oil, I found I couldn’t get the oil pan under the filter well enough to catch all the spillage from removing the filter. I moved the right jack stand toward the middle of the van to help with this part of the process.
The oil filter is located on the far right side. It is a bit tough to break this loose only by hand. I managed to get it loose with a small strap wrench. After letting it drain and separating it from the side of the engine, I was able to work it out without removing any other bracketry. Some people report that they need to remove the cross brace that passes under the filter in order to get the filter out and get the new one on, but that was not my experience.
I purchased my oil filter from superminitrucks.com for a very fair price. It is a Pro-tec brand filter, part number PTL51356/165. Be sure to remove the rubber gasket and give it a light coat of fresh oil before attaching the filter to the engine. edit: 2021-01-16: I have switched to a Bosch ST3300 filter. You can find oil filters that are compatible with the EN07 engine easily by checking for compatibility with an early ’90s Subaru Justy.
For the oil itself, I used Castrol full synthetic 5W30. edit: 2021-01-16: I have switched to Shell Rotella T6 synthetic 5W-40, which is the same oil I use in my ’02 WRX.
When reinstalling the filter, I used my usual “tight enough” technique, again using a small strap wrench to get a good grip on it and tighten it down. I normally prefer to just use my hand, but it was tough to get a good grip on this one. I have found that it is usually best to go with a lower tightening torque than it seems like you’d need, and then check it a couple of days later for leakage. If you see leakage, tighten it a bit more.
Transmission Fluid
My James Danko manual frustratingly does not explain how to change the transmission oil, or what kind of gear oil to use, so I had to do some research and figure things out for myself.
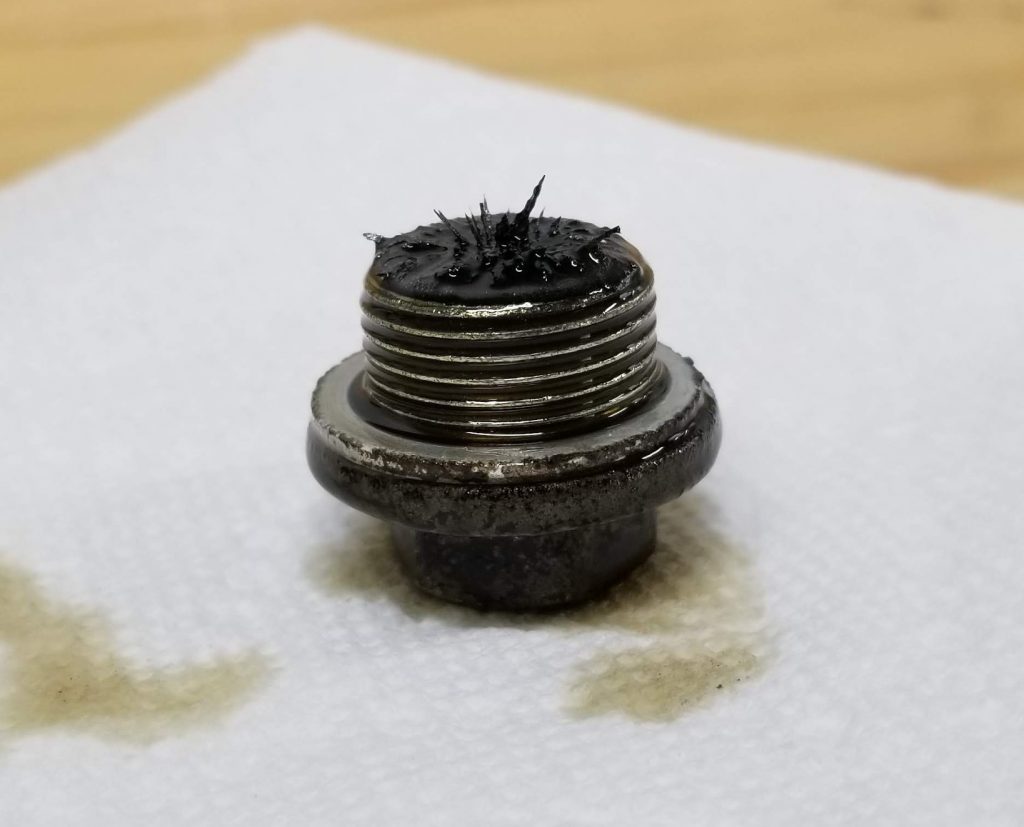
The 5-speed manual transmission in my van does not have a dipstick which can be used for checking the gear oil level or for filling. Both the drain plug and fill plug are hex head plugs (17 mm socket) located on the left side of the transmission, near where the rear left axle comes out of it. If you take it upon yourself to change its fluid, be sure to break the fill plug loose first, in case it’s too seized up to remove. Better to find out before you drain the thing.
The drain plug has a magnet. Mine was pretty thoroughly caked with steel particles. I cleaned it off, first using paper towels to get the bulk of it off, then compressed air to blast out the last bits. Finally, I also cleaned out the threads with compressed air before reinstalling the plug.
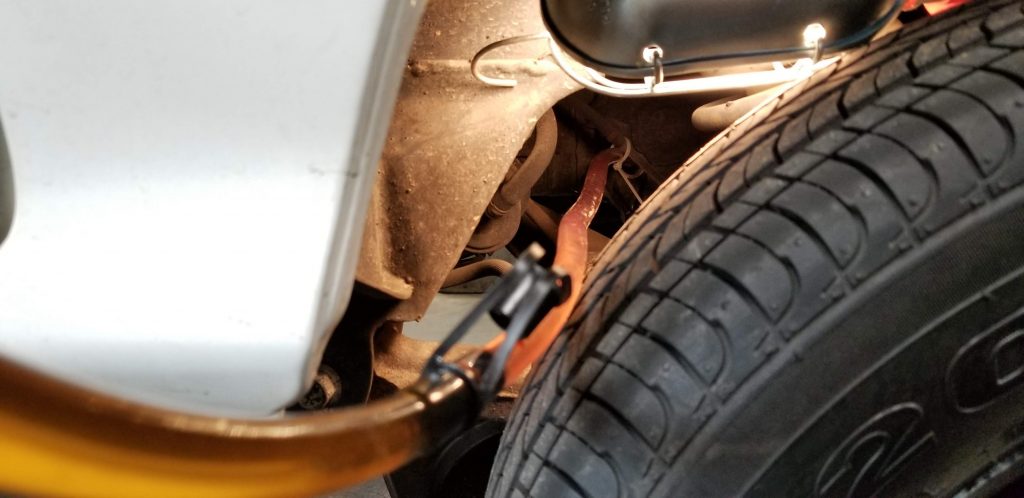
Filling it was a bit of a challenge, as there is no room above the fill plug for the bottle. I ended up using some vinyl tubing I had laying around and a funnel to rig up the apparatus shown below. It worked pretty well.

I used Redline MT90 GL4 oil, which is a 75W90 weight oil. Some searching on minitrucktalk.com yielded info for the TM transmissions, but nothing specific to the TY60 that I have, so I had to make some assumptions. Firstly, I chose GL4 oil as opposed to GL5 as it has fewer additives that can damage components made of brass, and I have no idea whether that is an issue on this transmission. Second, I chose 75W90 weight based on recommendations I had seen for the TM transmissions. Finally, I assumed that the 2.2 L capacity of the TM transmissions is probably close to the capacity of the TY60. Time will tell whether I made the right choice on the first two, but the third assumption seems to have been spot on. I was about a third of the way through the third quart bottle of oil when it reached the fill plug, which works out to 2.2 L.
As I did not have a torque spec for the drain and fill plugs, I just tightened them by hand firmly with a wrench. I also re-used the sealing washers. So far, no leaks.
The rear differential is integral to the transmission, so there is no need to separately deal with it.
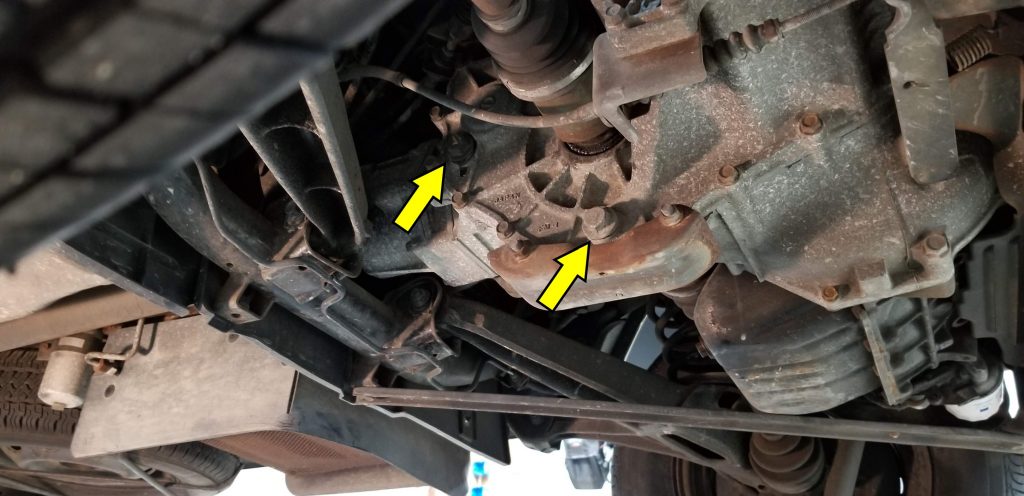
Front Differential Oil
The front differential looks just like the rear differential on most front-engined vehicles. It has a drain plug facing the front of the vehicle and a fill plug on the side, to the left. These plugs are also removed using a 17 mm wrench, and again you should confirm that your fill plug will break loose before you go ahead and drain the oil.
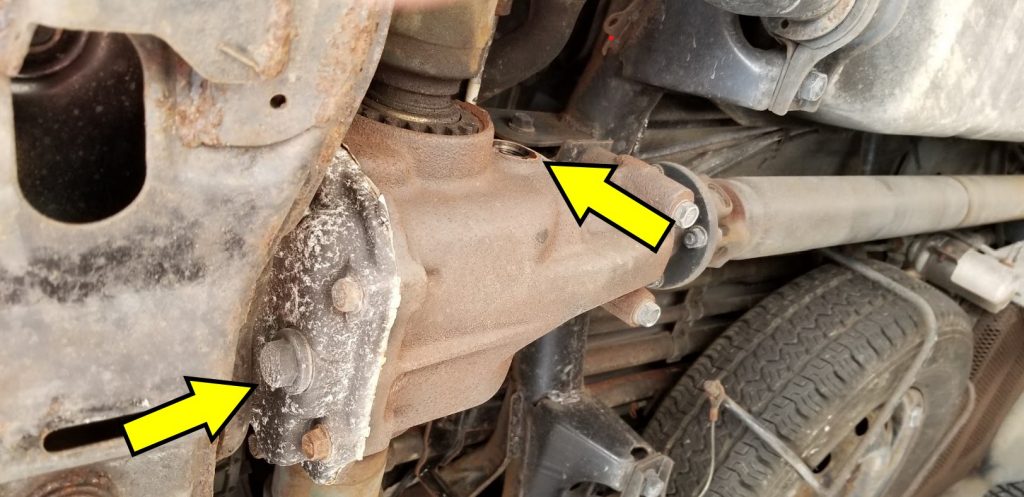
The drain plug is located right up against the front cross member, so I had to use a box end wrench and a dead blow hammer to get it off and also to tighten it back up. It did not have a sealing washer at all. The fill plug did have a sealing washer, which I re-used.
For this fluid, I used synthetic GL5 75W90 which I bought at my local auto parts store. One quart was almost exactly the right amount.
To fill the front diff, I again used a length of vinyl tubing. I squirted the gear oil directly into the tube using the pointy nozzle of the oil bottle. This didn’t work that well because air had no good way of getting into the bottle. If I do it again, I will hold the bottle as vertically as possible, and use a knife to poke a big hole in the bottom so that it drains quickly.