This one’s a little bit extreme. I designed and installed a custom backup camera.
The first thing you need to do is install a head unit that has a video input on the back.
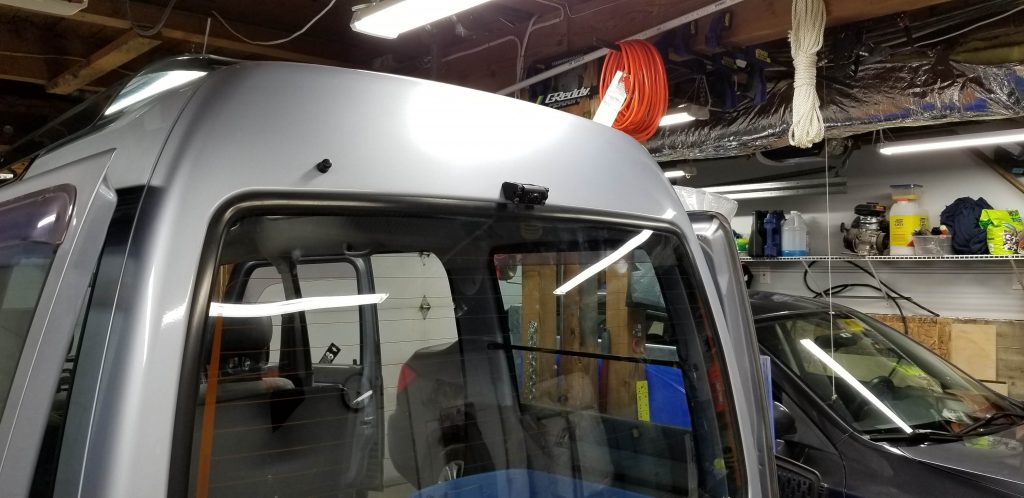
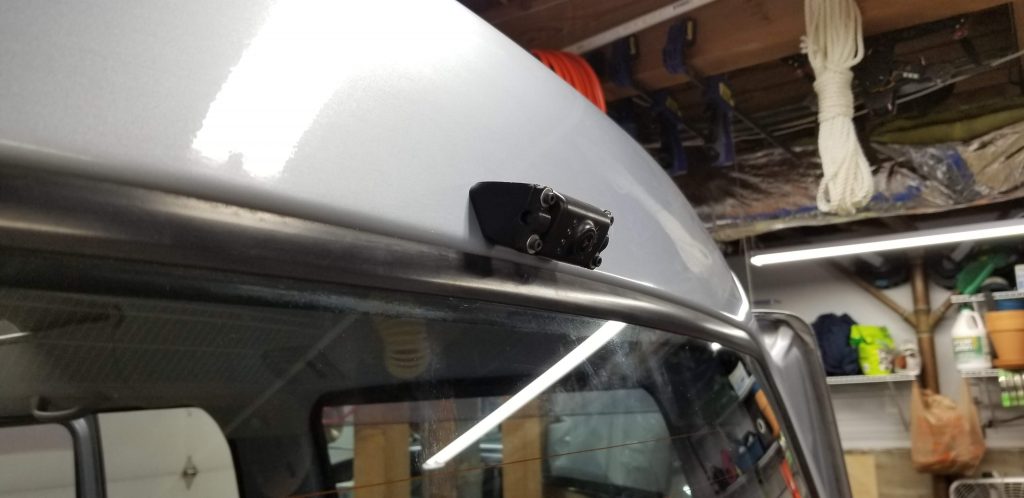
Next, you will have to figure out where to install the camera. A popular option is to mount it to the top of your license plate. I have one of those style cameras on my WRX, and I also installed the same type on my girlfriend’s Impreza. However, for a vehicle as tall and box-shaped as a Sambar van, it makes much more sense to install it as high as possible, so that you can get a view from above looking down that clearly shows where your rear bumper is relative to the rest of the world. I wasn’t able to find a cheap camera solution that would let me mount it wherever I wanted, so I had to go custom.
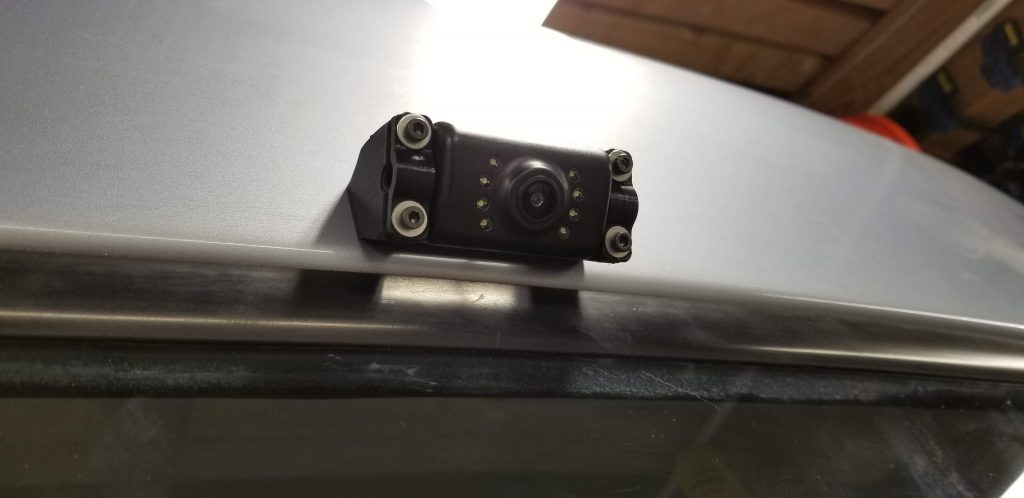
For the camera, I chose this license plate camera, which is the same one currently installed on my WRX and the girlfriend’s Impreza. However, I didn’t want to install it right above the license plate, so I threw away the whole bracket that it came with.
Instead, I designed and fabricated my own bracket. I shared the 3D CAD models for the bracket I designed here, on Thingiverse. Refer to the Thingiverse page for all info regarding successfully printing the brackets.
To mount the bracket, I placed the bracket where I wanted it and taped it in place, then marked the two mounting hole locations and the wire pass-through hole location first using a permanent marker and then a center punch. I removed the bracket and then drilled pilot holes for all three holes. Then I drilled out the wire pass-through hole to a suitable size, it was probably around 5 mm or 3/16 inch.
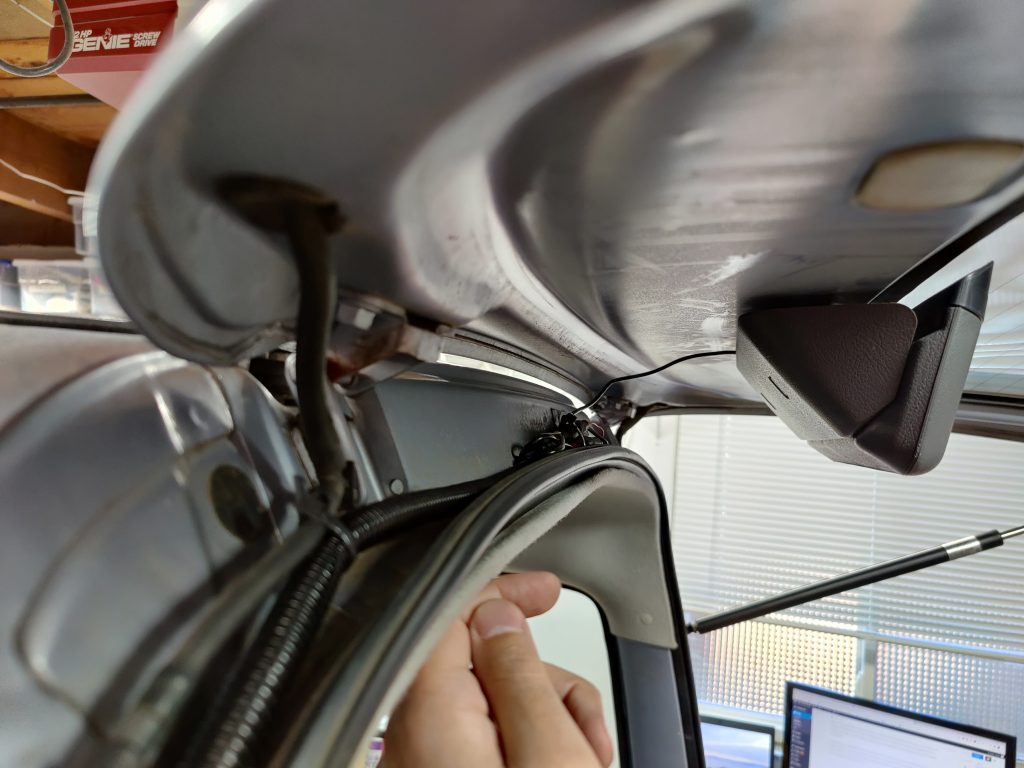
When I was ready to mount the bracket, I passed the camera wire through the bracket, then through the wire pass-thru hole I had drilled in the outer surface of the hatch, and then smeared the mating face of the bracket with Permatex black RTV silicone sealant before pressing it into place onto the hatch above the window. Finally, I fastened the bracket to the hatch using a pair of #10 flanged hex-head self-drilling sheet metal screws, at least 5/8″ length. Metric M5 sheet metal screws would also probably work.
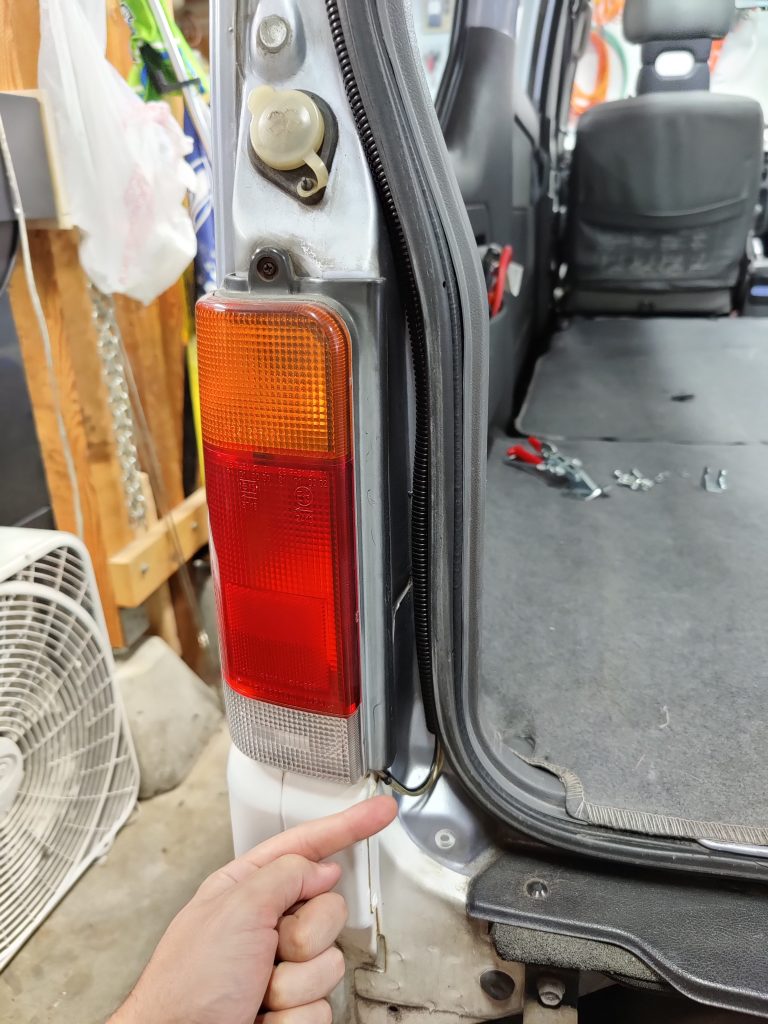
There was a bit of wire cutting and re-soldering involved with getting the camera signal and power through the outer surface of the hatch. I didn’t want to drill a gigantic hole big enough to fit the very large RCA style connectors through, so I cut the wire and re-soldered it to its connectors on the inside.
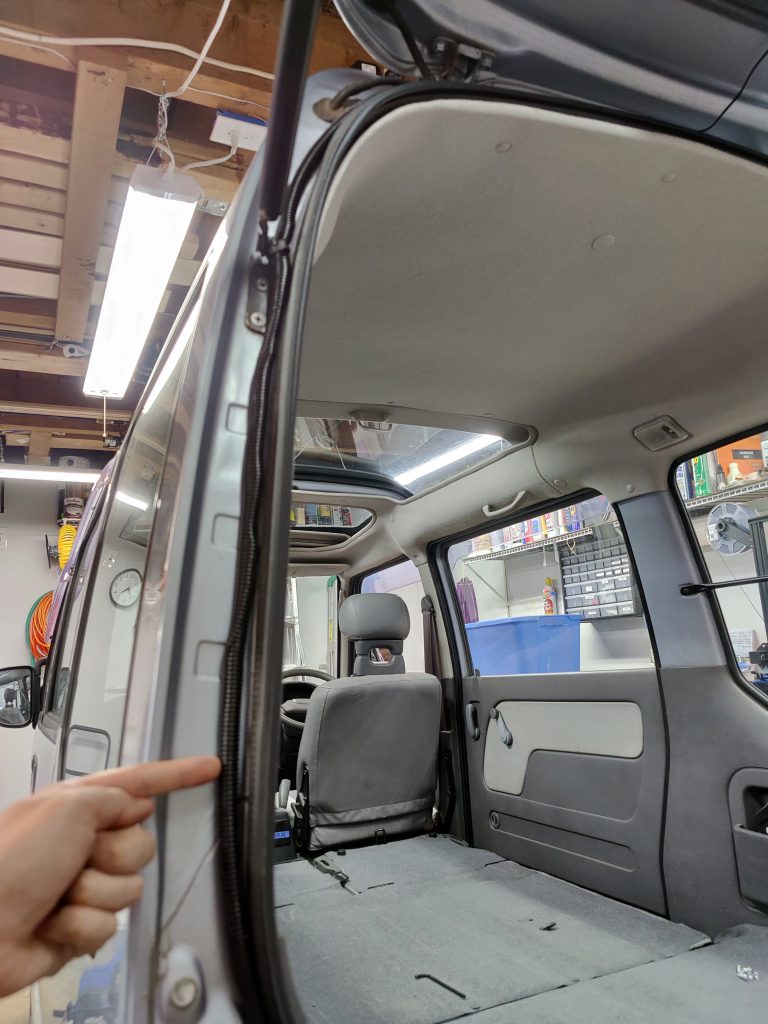
I will freely admit that I did a hack job of getting the wires from the inside of the vehicle to the camera. To be fair, almost all wiring work I do is a total hack job, but this one was particularly egregious. I was able to run the camera power and signal wires from the front all the way to the back without doing anything too stupid, up until they reach the back, behind the left side taillight. From there, I routed the wires out from behind the left taillight and ran them through some black wire loom up around the hatch seal until they reached the top. Then, the wires come out of the loom and plug into the connectors for the camera. (This bundle really needs to be better protected from moisture if you want to do it right. I was lazy.) Finally, the lone camera cable jumps across to the door, entering the housing for the upper brake light. Then, the wires come out through a hole I drilled through the vehicle body, above the rear window, and enter the camera itself.
The end result works great. I just wish my head unit’s display wasn’t so hard to see.
